Wednesday, February 6, 2013

Project Run and Play week 5: Men's dress shirt refashion

 
This week our challenge was to refashion a men's dress shirt.  I knew I didn't want to use the buttons vertically, my original plan was to use them at the neckline and have them go down the arms.  As I was constructing the shirt, I just started playing around and came up with a design as I went.  It's completely different than I envisioned.  It really kind of designed itself as I was putting elements together...I feel like my inner creativity was taking over and the left side of my brain was on vacation.  It was nice.

 
I placed the bodice front pattern with the shoulder seams on the edge of the shirt front with the botton holes.  I left the button hole placket intact and used it as a decorative element on the sleeves. I created bias tape from scraps of the shirt and used it around the neckline.  There are snaps where the front and back of the shirt overlap so it will fit over my daughter's head.  I used more bias tape to make a bow for the front that I embellished with an extra button.


I used the edge of the shirt with the buttons as the bottom hem of the front of the shirt.  I LOVE how this turned out.  I think it's a very creative use of this part of the shirt.  So cute!!


Here is my daughter modeling it.  I wanted it to be cropped, but I think it would be a better fit on a child a bit smaller than her.  I think one of my friends' daughters will be inheriting this top.  It's still cute, even if it is a little snug :)


Wednesday, January 30, 2013

Project Run and Play week 4: Valentine's Day Dress

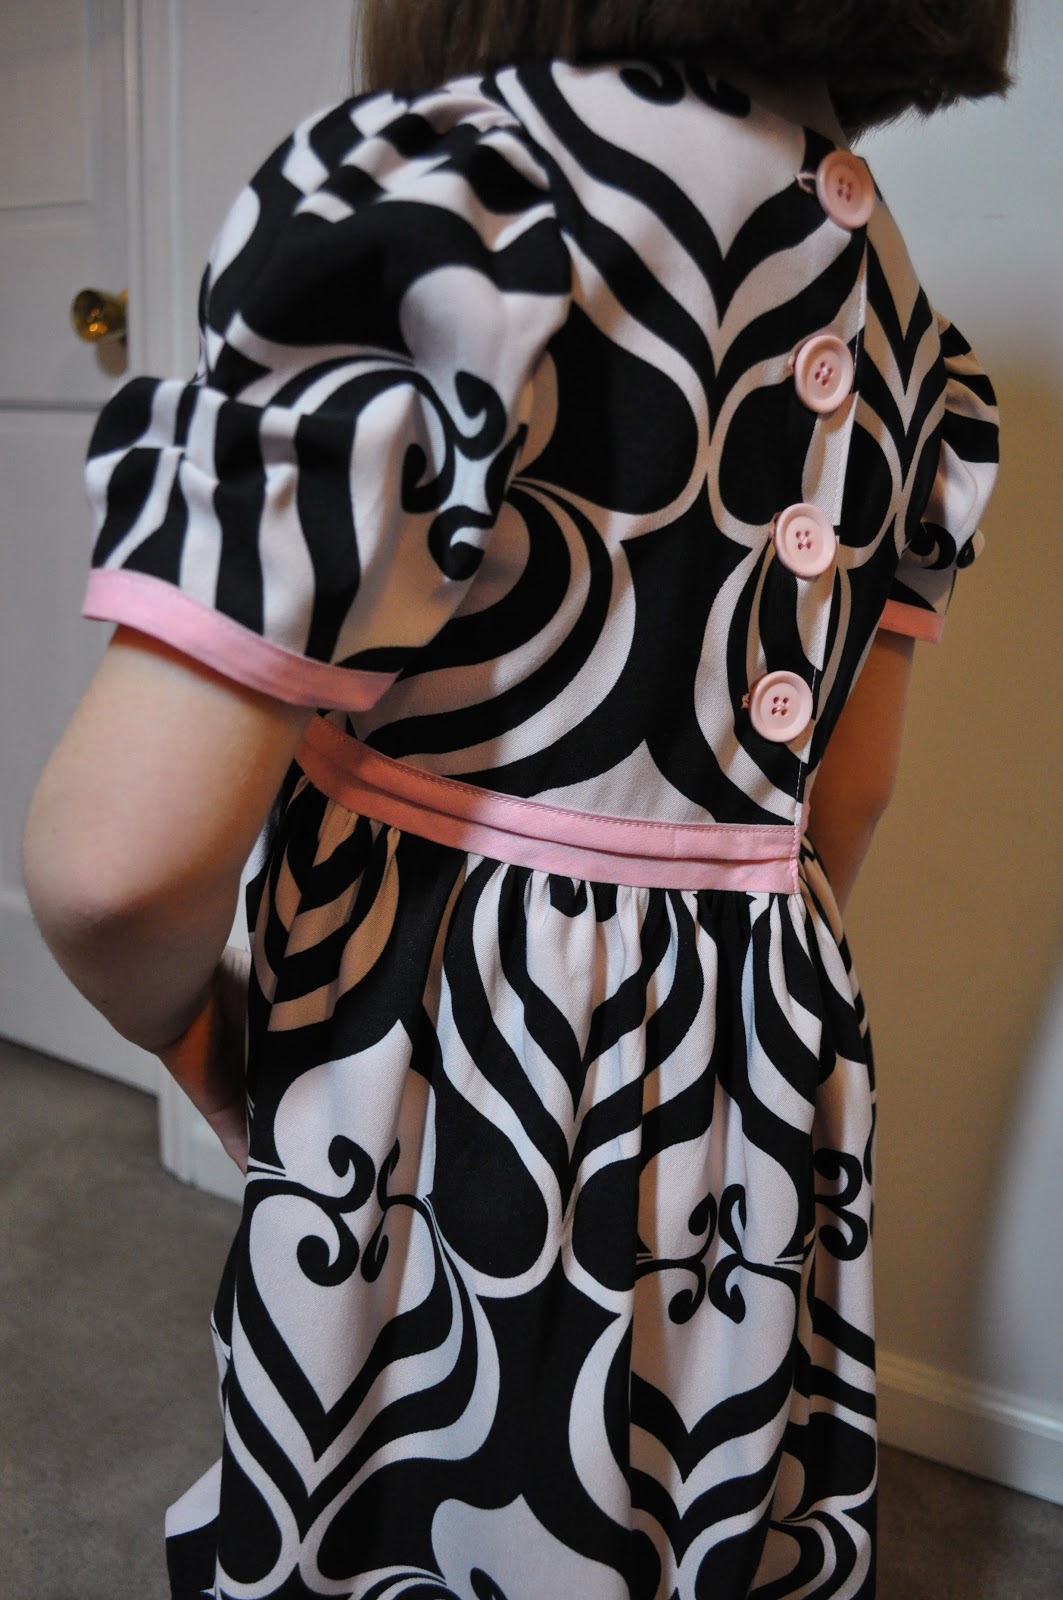
I LOVE how this dress turned out, I think it's partly because I actually slowed down and took my time.  I purchased the fabric a while back, it's a poly blend knit with a lot of body.  I honestly never noticed the heart motif until I was looking through my stash for something that would make a great V-day dress!  It was a black and white graphic pattern, but I knew I wanted to soften it a bit.  So I dyed it with a rose pink RIT dye.  It's a nice soft pink and black now. 


 I used Simplicity 2460 (Project Runway Collection) to base this dress off of.  I didn't change anything about the sleeve, other than to add the pink bias edge.  I added a bit more of a scoop to the neckline and cut my own skirt, opting to gather it instead of adding pleats.  My daughter wanted a bubble hem, so that is what she got...and it was such a great addition to the dress!  It added some fullness to the skirt, which it needed. 


This dress definitely made me think.  I knew I didn't want to use the waist band from the pattern, but I didn't want to simply join the bodice and skirt together.  So I edged the bodice in bias tape and stitched bias tape to the skirt as well....only I didn't finish it, I ironed it flat.  I then placed the bodice over the skirt and overlapped the tape.  I stitched over my original finishing seam on the bodice and joined the two together.  It was totally trial and error...I got lucky and it turned out super cute.


Thursday, January 17, 2013

Polka Dots!!! Project Run and Play week 2

This week, our task was to be inspired by polka dots and stripes. 


I have had this fabric staring at me for a year now.  When I sat and thought about it, it was screaming "make me into a full skirt!" ...so I did. 


This skirt is essentially 3 rectangles.
 
 
The front waist band, back waist band, and the skirt piece
 
I got a bit fancy and created an adjustable waist band.  The skirt is long enough that it my daughter should be able to wear it for a few years.  Having an adjustable waist band just made sense.


I pinned the front waist to back waist and marked 1/2 inch from the bottom and the mid point
 
 
I stitched the seam leaving a space where the elastic would be fed through

 
I folded it in half and serged the raw edge

 
I serged the side seams of the skirt, creating a tube and gathered the top edge.

 
I joined the skirt to the waist band

 
I added 2 button holes to each end of the elastic and inserted in into the channel in the waist band.  I sewed a button on each side and buttoned the elastic to the skirt.

 
I wanted to incorporate a stripe, so I made belt loops on the waist band and added a pretty coral ribbon.
 
 
Ta da!
 
 
I still have to get a picture of my daughter wearing it...I keep forgetting to, woops!


Tuesday, January 8, 2013

Mulan dress: Project Run and Play re-mix

My daughter LOVES Mulan. Which is appropriate for her because she has a very strong personality, just like Mulan. She has been asking for a Mulan dress for months. I was originally going to make it for her for Christmas, but ran out of time. I've also been thinking about joining in on the link party for Project Run and Play for quite some time now. When I looked at the pattern re-mix project, I thought I could combine these 2 ideas :) The bodice front is quite different, it crosses over to look like a kimono, and I edged it with handmade purple bias tape. The skirt was lengthened, and I eliminated the contrasting band, I also added a bell sleeve to add to the kimono look. For the waist band/obi, I cut my rectangles 25" x 6", rounding the edges. I added interfacing because I didn't want it to bunch up. I embelised the front with a 2 inch strip of red, and then added a 1.25 inch strip of gold. I sewed the 2 rectangles together, leaving an opening to turn it right side out. I slip stiched the opening closed, added a button hole on one end and a button on the other.

My daughter wore this dress to school yesterday, she came home and told me a bunch of her girlfriends want Mulan dresses now! I'm debating on whether or not I want to make it a bit shorter, so it's not so costume-like and more wearable. I'm also thinking of adding a contrasting band at the bottom, like the original pattern, in the same purple cotton used for the bias tape. This is when the artist in me comes out...I'm never fully satisfied, I have to keep fussing with things!